
Easy Weekend DIY Decor Projects for Your Home
This page may contains affiliate links. We may earn a commission for purchases made at no additional cost to you. The content on this website was created with the help of AI.
Want to make your home look new without big changes? Easy weekend DIY decor projects can do the trick. They add style and function without breaking the bank. Plus, many use stuff you already have, saving you money.

These simple projects have made my home better and made me feel proud. They cost about $15 each, so I can easily make any room look great. This guide has lots of ideas for both newbies and pros to get creative and decorate on a budget.
Transform Your Front Door with a Fresh Coat of Paint
A fresh coat of paint can make your home look better. It’s a cheap way to improve your home. Choosing the right color is key to making your home look great.
Choosing the Right Color
Think about what color will look good with your home. I’ve painted my door six times in seven years. I’ve used everything from bright blue to soft shades.
Here are some tips for picking a color:
- Choose colors that show your personality.
- Make sure the color matches your home’s colors.
- Bold colors like deep reds or blacks make a big statement.
After picking a color, think about how to apply it. You can do it in a weekend with just a few tools. Use good exterior paint that can handle the weather.
I like Satin Latex paint for covered doors. It’s durable but not too exposed. You’ll need about 1 pint of paint, but it depends on your door’s size.
Painting on a warm day helps it dry faster. It takes four to six hours for water-based paint. Make sure it’s at least 50 degrees Fahrenheit. Use painter’s tape, a microfiber roller, and clean up with baby wipes or Lysol wipes.

With the right tools and attitude, painting your front door is easy. It’s a fun DIY project that makes your home look better.
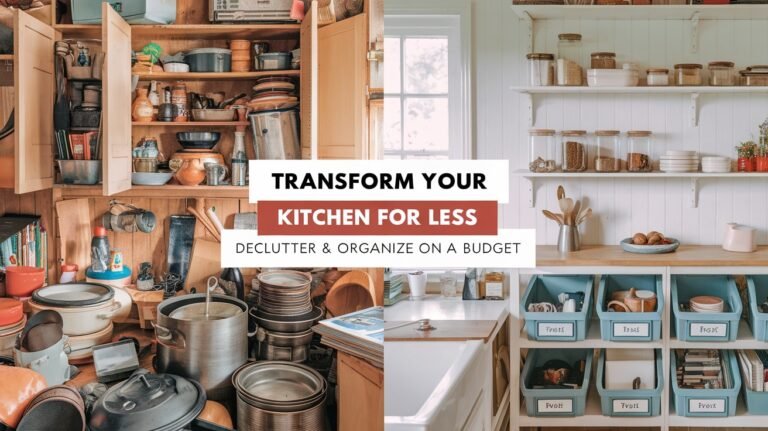
Upgrade Your Kitchen with a New Backsplash
Updating my kitchen with a new backsplash was incredibly rewarding. A good backsplash can make an old kitchen look new again. I picked materials like ceramic or glass tiles for their durability and style.
Selecting Materials
I looked for affordable kitchen upgrades to save money. Buying 20% more tiles than needed helped with waste and mistakes. For example, I used a 3/16″ – 1/4″ V-notched trowel for small mosaic tiles.
Having the right tools, like a tile wet saw and a grout float, was key. They helped me achieve a clean finish.

Using a laser level was better than a traditional level for straight tiles. This detail is important, especially with handmade tiles. I kept tiles at least 1/8″ apart.
Removing old tiles damaged the wall, but it was worth it for the upgrade.
- Plan and visualize your design before starting.
- Gather necessary tools, including:
- Tile wet saw
- Grout float
- Sponges and buckets
- Drill for drywalling
- Avoid grout haze to ensure a clean look after the installation.
I spent about $404.44 on my backsplash, not counting tools. This investment made my kitchen look fresh and welcoming. I hope to inspire others to try DIY projects that add a personal touch to their homes.
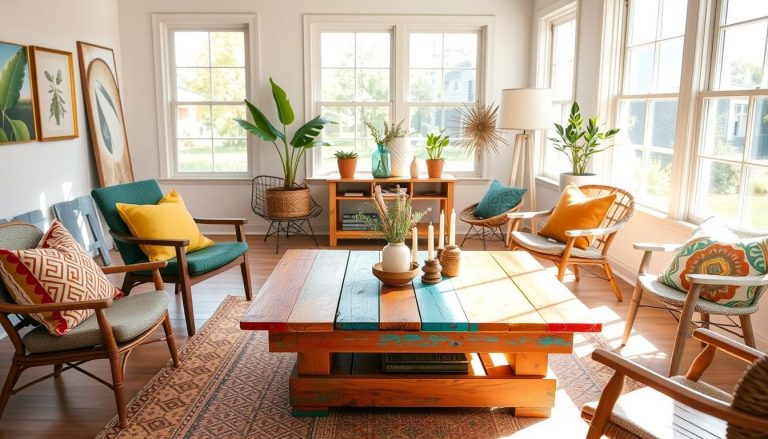
Easy Weekend DIY Decor Projects to Spruce Up Your Living Room
Updating my living room is a fun project that can give it a fresh look. I can use creative home decor crafts and simple DIY projects to make big changes. These can include rearranging furniture, adding new cushions, or painting a wall.
Ideas for Transformation
- Furniture Rearrangement: Sometimes, just moving furniture can change how I see the room. Moving a couch or changing art pieces can make a big difference.
- New Textiles: Adding colorful throws or new cushions can bring life and comfort to my living room.
- Accent Walls: A painted accent wall can be a stunning focal point, making the room look better.
- Personal Touches: Showing off family photos or special items can make my space feel warmer and more personal.
- Repurposing Old Items: Doing creative home decor crafts, like upcycling furniture, can save money and add unique touches.

Create a Cozy Outdoor Ambiance with String Lights
String lights can turn any outdoor area into a cozy spot. This project is easy on the wallet and fun to do. It makes my patio a great place to relax or hang out with friends and family.
Installation Tips
Setting up these lights is easy. Here are some tips to help:
- Use solar string lights to avoid cords and wiring mess.
- For a solid base, use 4×4 posts. Dig them 18 inches to 2 feet deep, depending on your area’s frost level.
- Anchor posts with quick-drying concrete mix. I found 40 pounds per post works well.
- Drill 7/8 inch holes for the hanging pipes.
- Attach black steel pipes (¾ inch) to flanges and caps for a rustic look. It’s also good for hanging flowers.
- Use cup hooks to keep the lights secure on your posts.
Spending a few hours—about 2 to 3 hours of work, plus drying time for the cement—can change your outdoor area. Many bloggers share tutorials on hanging lights, like using bamboo poles or pergolas. I’ve found lots of creative ways to light up my outdoor space, like coming up with 20 different string light arrangements.

Refresh Your Space by Replacing Cabinet Hardware
Updating cabinet hardware is a simple yet powerful change for my home. It boosts the look and feel of any room. With many styles to choose from, I find the perfect fit for my taste, whether it’s modern or rustic.
This update is affordable and makes a big difference in kitchens and bathrooms. Plus, it can be done in just a couple of hours.
Selecting the Right Style
Choosing the right cabinet hardware is key to a successful update. Here are some tips I follow:
- Consider the existing decor: I make sure the hardware matches my room’s theme.
- Material matters: I choose materials like brushed nickel or antique brass that fit my style.
- Size and scale: I consider how the hardware size looks with my cabinets. Big knobs on small cabinets can look off.
- Personal touch: I often add unique or handmade pieces for a personal touch.
By considering these factors, I start a simple home improvement project. It adds character to my space without breaking the bank. Whether I choose a trendy matte black or a classic ceramic, each choice makes my home feel special.

Install Beaded Board for a Classic Look in Your Home
Adding beaded board to a room can make it stunning and classic. It’s great for kitchens and mudrooms. This timeless choice works well with both modern and traditional designs. It’s also a great DIY project for a weekend.
Preparing the Area
Before starting, make sure the area is ready. Here are some steps to follow:
- Measure the walls to figure out how much beaded board you need.
- Clear the space by removing any trim or furniture that may get in the way.
- Plan for any special cuts for outlets or features, making detailed measurements for a perfect fit.
- Mark a level line around the room, slightly higher than where the beadboard will end, to guide your cutting and installation.
Beaded board comes in large panels, making it affordable and easy to use. Choosing a muted sage color adds to the room’s ambiance. It works well with both traditional and contemporary designs. I think anyone can do this project with the right tools and materials.

With a little preparation, you can turn an ordinary space into a warm, inviting place. Installing beaded board is a great way to add classic design to your home. Plus, you’ll enjoy the satisfaction of a DIY project.
Easy Weekend DIY Decor Projects for a Modern Bathroom Update
Updating a bathroom can be a fun adventure. It’s especially exciting when you can do it on a budget and get amazing results. With just a few changes, you can turn a dull bathroom into a stylish space over the weekend. Whether it’s new fixtures or decorative touches, small changes can make a big difference.
Key Changes to Consider
- Fixtures: Swapping old fixtures for modern ones can make a big impact. Low-flow showerheads are stylish and save water.
- Paint Colors: A new paint color can instantly brighten up the bathroom. I like using DecoArt Satin Enamels Paint for its durability.
- Countertops: The Giani Carrara White Marble Epoxy Countertop Kit is a budget-friendly way to get a marble look. It’s elegant and affordable.
- Mirror Framing: Framing a mirror adds a personal touch. In 30 minutes, you can create a unique look with MirrorChic frames.
- Wall Stencils: A stencil like the Rabat Allover Wall Stencil can make a striking feature wall. It turns simple decor into a focal point.
- Towel Bars: Using antique hooks as towel bars adds charm. Mixing old and new materials keeps the space stylish and inviting.
These changes can give an old bathroom a new life. They show how easy it is to do DIY projects on a budget. With careful choices and creativity, you can make big changes without spending a lot.
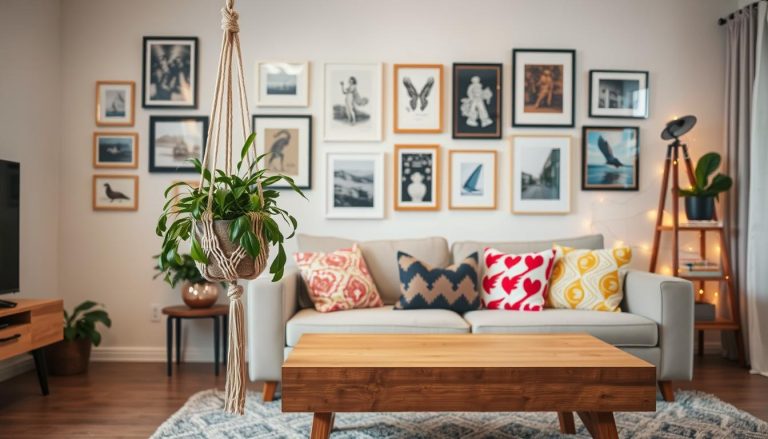
Add Character with a DIY Gallery Wall
Creating a DIY gallery wall has been on my to-do list for a while. It’s a great way to add character and personality to my space. A well-curated gallery wall can turn a simple area, like a staircase, into a stunning visual display.
When I finally started this project, I realized it’s an easy way to improve my home decor.
Arranging the Perfect Display
As I planned my gallery wall, I focused on collecting and curating various wall art ideas. Mixing different styles and sizes of artwork, while repeating colors 2-3 times, helped tie everything together. Adding family photos in black and white enhanced the look and matched the color palette.
To frame them well, I chose wide mats for a modern touch.
Some tips I found helpful for arranging my gallery wall included:
- Measure the space before hanging to find the right fit.
- Balance the sizes and colors of the artwork for a cohesive look.
- Create a gallery wall template by using painters tape to map out the arrangement.
- Incorporate one to three larger pieces as focal points, filling in with smaller artwork.
- Use varying frame finishes, such as wood, metal, and neutral tones for added visual interest.
- Include dimensional pieces, like mirrors or ceramic wall hangings, to break up the space.
Patience is key while planning your gallery wall. I used software tools like Illustrator to digitally draft my layout. This ensured everything fit perfectly. Alternatively, laying pieces out on the floor before committing to nails helped me visualize the arrangement more clearly.
With each frame carefully placed, I learned that thoughtful planning ensures a striking and well-balanced DIY gallery wall. This project not only added charm to my home but also fulfilled the need for creative home decor crafts. As I admired the final result, the effort felt entirely worthwhile, especially as I reflected on the 50 ways to add character to a home.
Spruce Up Your Entryway with DIY Furniture
The entryway is the first thing guests see when they arrive. DIY furniture can turn this area into a stylish and useful space. Easy DIY projects can make a big difference, especially in entryways. Making your own furniture saves money and lets you add your personal touch.
Functional Furniture Ideas
Turning your entryway into a functional space is easy with DIY projects. Here are some great ideas:
- Entryway Table: A simple table with lower shelves is perfect for keys and bags. It also has space for decor.
- Bench with Storage: A bench that holds shoes and bags is both useful and cozy.
- Shelves: Shelves are great for displaying personal items and keeping things organized.
- Repurposed Items: Old furniture or thrift store finds can become unique and charming pieces.
- Decorative Mirrors: Mirrors not only beautify the entryway but also help with last-minute outfit checks.
These projects are affordable and make your entryway more useful. Small changes can make a big difference, welcoming guests into your home.
Enhance Your Patio with a DIY Umbrella Table
Making a DIY umbrella table adds a cool touch to outdoor hangouts. With basic carpentry skills and common tools, I can turn wood into a great spot for meals or chill days. It’s a fun weekend project that beautifies my patio.
Step-by-Step Building Process
To begin my patio makeover, I collect the needed stuff and tools. The table needs:
- (2) 8′ long 2x4s
- (1) 8′ long 1×3
- 32 Kreg Jig screws (2 1/2″)
- 4 pieces of 2×4 cut to 11″ long for the stand
- A lightweight plastic planter for the base
- A 4 1/2″ x 3/8″ hex bolt for the umbrella base
Here’s what I do next:
- Drill a 3/8″ hole in the bottom shelf of the table.
- Drill a bigger hole in the tabletop’s center for the umbrella pole.
- Smooth the edges around the holes with sandpaper.
- Stain all sides of the table with Valspar exterior stain in Pinebark. Wait 24 hours for it to dry.
- Attach the tabletop to the stand with finishing nails and Kreg Jig screws.
- Drill holes in the planter for drainage to keep it stable and long-lasting.
Once done, my DIY umbrella table is perfect for hanging out with loved ones. It’s a great way to make memories and boost my home’s value.
Give Old Furniture New Life with DIY Renovations
Renovating old furniture is rewarding and budget-friendly. I’ve transformed many pieces, adding charm to my home. DIY projects are creative and often stunning, without the high cost of new furniture. They can also add unique touches to any decor.
Techniques for Upcycling
I’ve worked on many dresser makeovers, like turning a dresser into a bathroom vanity. I found a great deal on old furniture for a baby boy at a thrift store for just $100. An 1800s dresser was mine for $30 at a flea market, showing the value of budget-friendly furniture projects.
My family loves two-toned furniture makeovers. Vintage washstands are our favorite, with over 50 projects done. During the pandemic, desks became popular, and I reused an old desk as end tables. I also turned an outdated desk into a stylish long table.
I saved a mid-century china cabinet from an auction and gave it a new look. I also transformed solid oak hutches from my wedding day. After four makeovers, my hutch still looks great. A 1930s pantry got a fresh look with paint stripper and a new coat of paint. These stories show the power of DIY.
For anyone thinking about a project, there are many options. You can renovate:
- Wooden coffee tables
- Dining room chairs
- Laminate dressers
- Wicker chairs
- Metal bar stools
- Bedside tables
- Old bookshelves
- Vintage sideboards
- Mid-century modern desks
- Upholstered benches
- Cane-backed chairs
- Antique vanities
DIY refurbishment opens up many creative techniques. You can:
- Strip paint and apply clear wax
- Paint or stain
- Add furniture wax for protection
- Clean and restore
- Spray paint for a quick update
- Change hardware for a modern look
- Swap out legs for style
- Reupholster for a cosmetic update
Beginners need simple tools like sandpaper, paintbrushes, and a staple gun. These tools help make obvious changes that give old furniture a new life.
Transform Your Kitchen with New Lighting Fixtures
After years with old fixtures, I updated my kitchen’s lighting. Switching from 12-year-old setups was rewarding. New lighting not only improves visibility but also changes the kitchen’s feel.
I found great deals at Home Depot that fit my budget. These affordable upgrades are perfect for anyone looking to improve their home.
Tips for Installation
Installing new lighting might seem hard, but it’s doable with patience. I did the DIY light fixture installation with tools from home. Dimmers I installed a few years ago let me adjust the light for different activities.
Here are some tips I found useful:
- Choose fixtures that match your kitchen’s style.
- Ensure you have the right measurements for fixtures and space.
- Consider recessed lighting for a clean look that fits various designs.
- Look for creative solutions like DIY farmhouse chandeliers for a unique look.
I strongly suggest updating your kitchen’s lighting. These changes can make your kitchen more functional, charming, and valuable. Whether you plan to change the backsplash or open up a cabinet, new lighting is a great start for your home decor dreams.
Create Storage Solutions with DIY Floating Shelves
Creating storage in my home needs creative ideas. DIY floating shelves are great for using vertical space. They help keep my living area tidy without clutter. Plus, they’re easy to make, perfect for anyone on a budget.
Maximizing Vertical Space
DIY floating shelves are both useful and stylish. You’ll need Southern yellow pine, 1/2 inch oak dowel, wood screws, and some finishing products. The oak dowel is cut into nine 4-inch pieces for a solid base.
These shelves can hold 50 to 60 pounds. I mount them 20 inches high for easy access. Drilling into studs adds extra support, as studs are about 16 inches apart.
For building, I use pocket holes and wood glue for strength. Measuring carefully ensures a good fit. You can also adjust the shelf depth based on your materials.
Finishing is key. I use pre-stain conditioner, gel stain, and polyurethane for a glossy finish. This brings out the wood’s beauty and matches my home’s decor.
I highly suggest DIY floating shelves for a space makeover. With the right tools, like a circular saw, you can add a stylish and practical feature that shows off your taste.
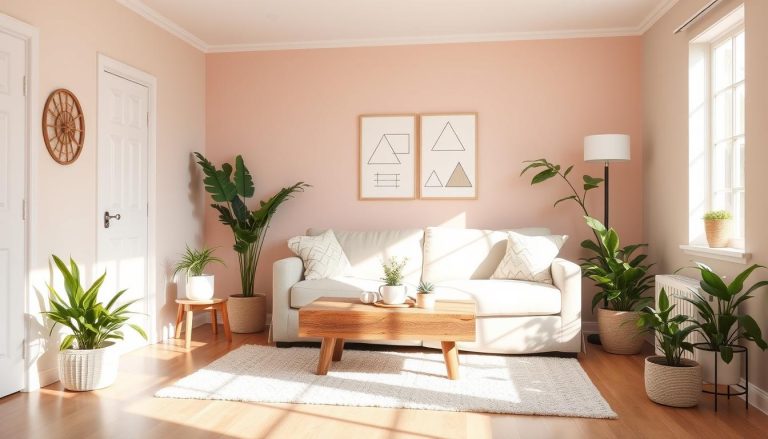
Upgrade Your Bathroom with Affordable DIY Decor
Transforming my bathroom doesn’t have to be expensive. Small, budget-friendly projects can make a big difference. With a bit of creativity, I can add stylish touches without a full makeover.
Simple Decorative Touches
One way to enhance my bathroom is to focus on a few key projects. For instance, I can update my mirrors with wooden designs for about $70. Another easy change is painting or refinishing my vanity or cabinets.
Here are some ideas:
- Introducing *statement wallpaper* for a lively backdrop.
- Installing *beadboard* or shiplap for elegant architectural interest.
- Updating light fixtures for a modern vibe.
- Incorporating *flea market finds* for a personal touch.
- Using a $3 can of appliance epoxy to refinish countertops for a sleek look.
Adding storage is also important. I can use pullout shelves or stylish baskets to save space. Repurposing old furniture can make my vanity look elegant and functional. For a spa-like feel, I can add rain-style showerheads or glass mosaic tiles at a good price.
There are many affordable ways to update my bathroom. I can change the flooring, soft surfaces, or even create two-tone walls. These easy upgrades can turn my bathroom into a cozy, new space without the high cost.
Create Outdoor Planters from Repurposed Items
Creating outdoor planters from old items is a great way to be creative and green. I enjoy finding new uses for everyday things, making them useful and unique for my garden. This DIY project not only beautifies my space but also saves money, offering smart gardening solutions.
DIY Planter Ideas
Many items are perfect for turning into planters. From mop buckets to cinder blocks, each adds a special touch to the garden. Here are some of my top picks for upcycling projects:
- Mop buckets for bold, eye-catching displays
- Cinder blocks with built-in plant spaces
- Denim jeans turned into hanging planters
- Tea tins, great for small herbs
- Old ceramic cups that bring charm to any porch
By making these planters, I help reduce waste and enjoy lasting beauty in my garden. Thrift-store finds like salad bowls cost just 50 cents, making this a budget-friendly option.
Applying Dixie Belle’s Caviar Chalk Paint gives my planters a fresh look. Adding outdoor sealer keeps them protected from the weather.
Trying out unique items like an old cooler or single-serve coffee cups lets me play with size and style. The endless possibilities make my garden and creativity flourish.
Add a Touch of Nature with DIY Window Boxes
DIY window boxes can make your home feel welcoming. They’re a great way to bring nature into your outdoor decor. I found making them to be very rewarding and fun. It lets you pick the perfect plants for your boxes.
After visiting three local nurseries and Lowe’s, I found many plants to choose from. These plants will make your window boxes beautiful all year.
Installation and Planting
I chose reclaimed cedar fence planks for my window boxes because they’re durable. I made two sizes: one 41″ long and the other 23″ long. Once they were up, I added plastic lining, drilled holes for drainage, and filled them with soil.
I picked a mix of real and fake plants for a beautiful look. In winter, I use boxwoods and juniper. For the rest of the year, I add seasonal flowers like SANVITALIA for full sun. In shady spots, COPPERHEAD COLEUS adds color.
With a bit of planning and the right materials, my window boxes turned out great. They’re a beautiful addition to any gardening project!